Down the Rabbit Hole
For this tutorial you will need:
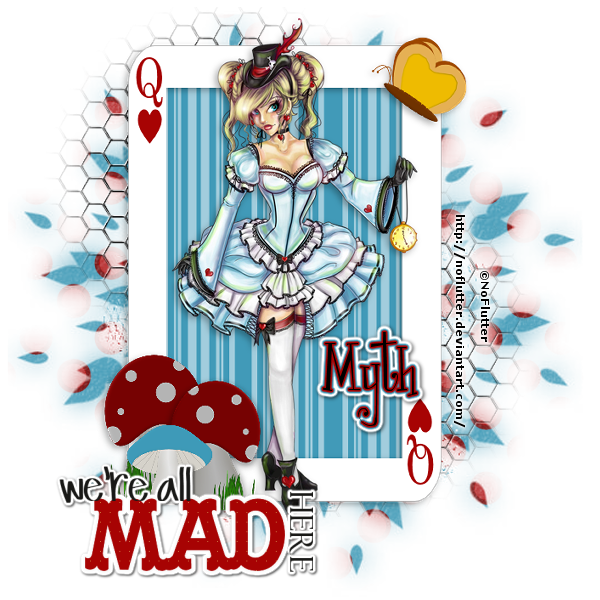
A tube of choice, I am using the brilliant work of NoFlutter,
Check out her work Here
I have included 4 Alice in Wonderland Themed tubes by
NoFlutter in the supplies
My Down the Rabbit Hole Goody Train Freebie kit Here
and my wordart also supplied
Eyecandy Gradient Glow (Optional)
Mask 39 by Gems Taggin Scraps Here
Font - I used Girls are weird Here
Supplies Here
Open a blank canvas 600 x 600, flood fill with white
Copy and paste a paper from the kit as a new layer,
apply the mask, right click the mask layer, merge, merge group
Copy and Paste frame1 as a new layer, go to image, resize, resize by 85%
smart size, resize all layers unchecked.
Copy and paste the chicken Wire from the kit as a new layer, Move slightly upward and to the left
so you can just see it (see my tag for refernce) duplicate this layer, go to image, mirror,
image, flip. right click on the top Chicken Wire layer, merge, merge down
move this layer below the frame layer
make sure the frame1 layer is active
Select the magic wand, tolerence 0, feather 1, click inside the frame, go to selections,
modify, expand and expand by 5 pixels, copy and paste a paper from
the kit as a new layer, go to selection, invert, hit delete on your keyboard, back
to selections, select none, move this layer below the frame layer.
add the following drop shadow to the frame:
H&V -2, opacity 55, blur 12 colour black.
Copy and paste your tube of choice as a new layer add the same drop shadow
but change the Horizontal to 2.
Copy and paste any of the elements you want to use and arrange to your liking.
Copy and paste the word art as a new layer, arrange to your liking. colourize to your liking
I added a gradient Glow then a drop shadow but just the drop shadow will work just as well
with the following settings. H&V 2, Opacity 100, blur 1, colour white. Then add another drop shadow
with these settings H&V 1, Opacity 74, blur 4, colour black.
If you are not using the eyecandy gradient Glow plug-in
Add your name and copyright Information. you are done.
add your name (Using Graident Glow)
select the font tool and select Girls are weird, size 48, change the background colour
to black, foreground null. type out you name. right click the text layer, convert to raster layer
Set the foreground and background colours to two colours of your choice
add a graident using the following settings:
Basic tab
Glow width = 3.00
soft corners = 25
opacity = 100
Color Tab
Choose Fat
click on the dropper click on a colour on your tag, move the slider half way along,
click the small white slider then choose the other colour
Add another Glow using the same basic settings, on the colour tab just choose fat and click ok
Add the following drop shadow
H&V 1, opacity 77, Blur 7, colour balck.
Add the correct copyright information. you are done!
Tutorial written by © Mythical
all rights reserved


