| Title: Pretty Mushrooms | |
| Babs5251 > Animation Tuts > PSP Tuts | Go to subcategory: |
| Author | Content |
|
JigsawQueen
|
|
|
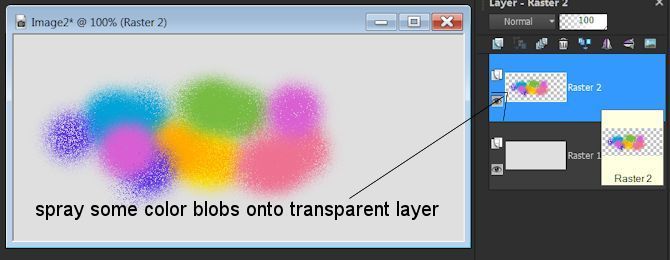
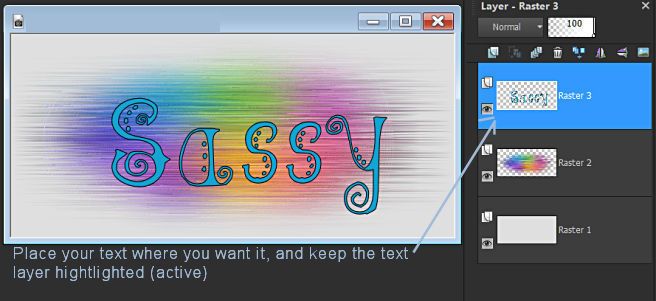
Date Posted:07/08/2017 14:34 PMCopy HTML An "In Name Only" Tutorial: Pretty Mushrooms Supplies: Sheet of insects HERE Font: Sparty Girl you can find it HERE Start with a new transparent image of 600x275 1. Flood fill the image with white 2. Add a new layer and get out your airbrush (found in the drop menu of the regular brush) with these settings Shape: round 3. Spray some color blobs onto your transparent layer, using these colors : blue: #07a2d7
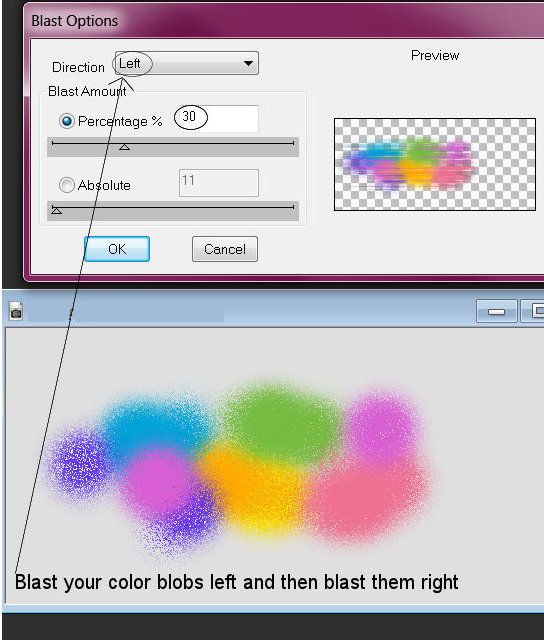
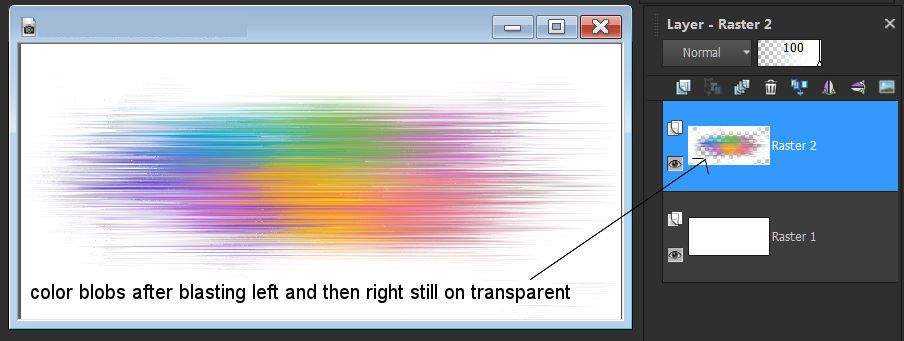
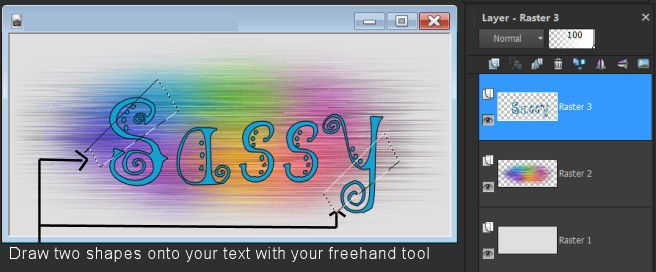
5. With your color blobs layer still active go to EFFECTS/ DSB Flux/Blast and use these settings: 6. Repeat step 5 except choose RIGHT this time and click ok 7. Now we are going to add the name, so go find the font "Spartygirl", and according to how long the name is choose the size. I used the size 125, Stroke 1 8. Go to your material palette and for your stroke color choose 9. Type in the name/text and then convert to raster, and move it to wherever you want it to sit. 10. Now we are going to add some other colors to our text/name. Go to your tool bar and choose your FREEHAND selection tool, aka rope tool. Choose POINT TO POINT and the mode to be ADD(SHIFT). 11. Now we can "draw" an area we want to color, in my sample picture you can see I have chosen the first letter and the last letter to add color to by drawing in two rectangles. 12. Once you have your selection ants where you want them, go to your tools and choose your COLOR CHANGER tool. (It is found in the drop down menu of the flood fill tool).
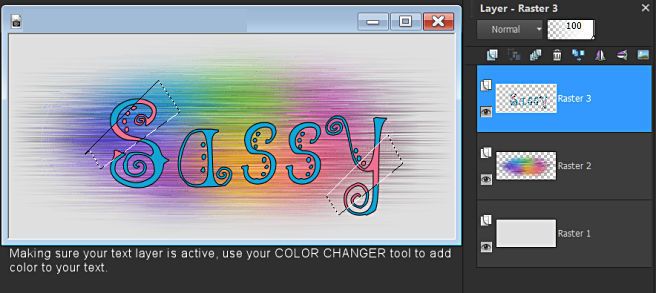
13. In your material palette you are going to pick the STROKE (top box) color (the bottom box doesn't matter the color because it doesn't affect what we are doing). and then with the text layer highlighted, just click inside the ant selection you drew and you will see your text now has changed color. Deselect your drawn ants.
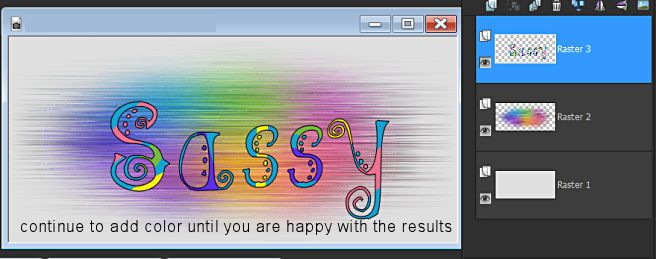
14. We are now going to do the same thing again, choosing a different area of the text to add color to, following the steps in at this point should look similar to my sample picture below.
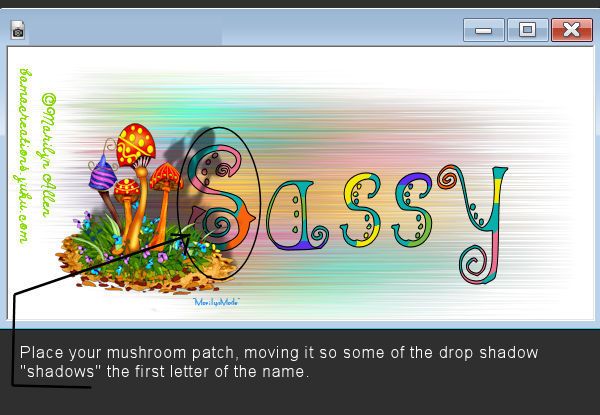
15. Now that we have our name/text the way we want it, we are ready to decorate the name/text. So go get the "MUSHROOM PATCH" tube and go to EDIT/COPY. 16. Go to your text image and click to make it active and then go to EDIT/PASTE AS A NEW LAYER. You should now have your "MUSHROOM PATCH'', on top of the text layer. Move it over so that the shadow of the MUSHROOMS, is slightly covering the first letter of text. (see picture below)
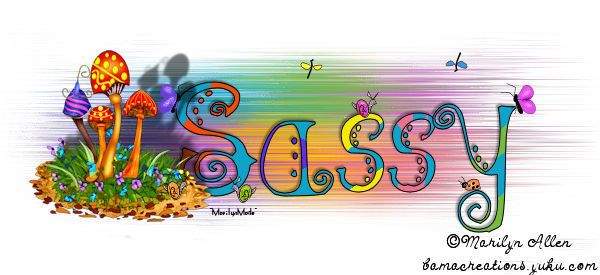
19. Whew! Almost done!! Now we are going to decorate the rest of the text/name, with a few snails, lady bugs, and butterflies. Add them sparingly, I gave you way more than you will need. 20. Go back to your text/name and add a drop shadow, here is the settings I use on most all of my drop shadows. something you will remember and SAVE. 21. If you like you can also add a drop shadow to your little snails and stuff. I usually drop mine down to half of what I did on the test shadow. So it would be: Vertical -1 22. If you haven't already done so, add your watermark and the copyright.
Voila!! You have completed another "IN NAME ONLY" tag!! Any resemblance to another tutorial is purely coincidental. |


 m
m