

| Title: Text on a curve, two ways | |
| Babs5251 > Animation Tuts > PSP Tuts | Go to subcategory: |
| Author | Content |
|
JigsawQueen
|
|
|
Date Posted:07/08/2017 14:55 PMCopy HTML There are 2 kinds of "text on a curve" out there that I have noticed...there might be others but the 2 most popular types are: Bezier Curves: The most difficult of the 2 types as far as the amount of knowledge you need and the amount of practice it takes is this one... So I am not even going to go into because beziers are a tool all its own. The second way of getting something to curve is thru the use of vectors that we can either draw with our pen tool which is always in vector, or we can use our preset shapes which are always in vector. So along with that we have another thing we can get to in vector and that is fonts, so...the key word here is VECTORS...you don't have to know how a vector works, you just have to realize we will be working with vectors. And the way you know they are in vector is because a vector object will have a lined box around it and it will have little tiny squares in each corner and then one in the middle on each side an top. Those are the nodes I speak of in this tutorial. So...let's get out a canvas that is 500x500 white background. We are going to put something on the curve of a circle. But you can use any vector shape you want. 1. Choose a stroke color and a fill color in your material palette 2. Get out your preset shape tool, it is in your tool bar on the left... on my version it is 4th from the bottom and looks like a call out box. Be sure and use the one that says "PRESET SHAPES", not the one that says elipse. 3. When you click on your preset tool it's menu bar shows up across the top of your works space. Look there for a window that has a picture of a shape in the window. Click the down arrow on the shape window and then scroll down to elipse and click ok. 4. in the little boxes next to the window UNCHECK Retain style, antialias CHECKED, Create as vector CHECKED 5. Line style solid , Width : 12 None of the other features matter so just leave everything else at its default. 6. While holding down your shift key (to retain the perfect circle, if you want an oval then don't hold down the shift key) starting at the top left area of your canvas (be sure to leave enough room to add letters to the outside of the circle), click and drag your mouse over to the right and down towards the bottom of your canvas until you have your circle the size that you want it. Release your mouse and you now have a circle with the VECTOR BOX and nodes around it...If your circle is too big or too small, you can adjust it by grabbing one of the corner nodes and dragging in or out which ever size you need it to be. Now convert it to raster. 7. Go back to your Preset Shape and get out your elipse again but this time I want you to CHECK the RETAIN STYLE box. Leave everything else the same. ****When you do this next step, do not expect to see another colored circle appear, it won't happen. All you are going to see is a black line in the shape of a circle, the center is hollow . *** 8. Now catching the top left edge area of your colored circle and with the shift held down you are going to draw another circle the same size as your colored circle. Don't sweat it too much as to the size your draw because you can adjust it up or down, in or out, with your nodes until you have it EXACTLY right. Once you have your VECTOR circle adjusted to the same size as your colored circle, LEAVE IT IN VECTOR. 9. Next go over and get out your Text Tool, choose a font you want to use for your words that are going to curve around the circle, also choose the colors you are going to be using on the font. 10. Now here comes the part that is going to make this all happen...With your text tool choosen, starting over to the left, area of your vector circle, slowly move your cursor/mouse over the line of the vector circle, watch for a little symbol pop up near the tip of our mouse arrow it is a capital A with a curved thickish line that looks like a rocker arm under the A. That little rocker arm is what makes the text curve around that vector circle, so once you see it click your mouse once and the TEXT BOX comes up as usual. ***Note: if you see that when you start typing that the text is not curving, that means you missed the rockerA and need to try again.*** When you start typing in your text box window you will see the text curve perfectly with the curve of the vector circle. ****Important TIP:...When working with text on a curve, you always need to start farther to the left than where you want the words to actually start because you can use your space bar to move your text to the right but you can't space bar it back past where you began. *** 11. Once you have your text the way you want it to look, click apply in your text box window. LEAVE EVERYTHING STILL IN VECTOR. 12. Go over to your layer palette and just to the left of your vector layer you will see a plus sign, click on the plus sign. 13. Scroll down until you see the round hollow elispe layer and hide it (click on the eye and an x will cover it) 14. Right click on your vector layer in your layer palette and scroll to convert vector to raster and click... you now have your curved text and can merge it or what ever you want to do to finish off the tag as usual. Tips: If no matter how you try, you just cant seem to get your words to look centered and not longer on one side or the other, don't make the mistake of trying to adjust it with your vector nodes once you have it typed in, if you do it will really blur and make your text go awry. Just take my word for it, don't try moving words around in vector circle...lol Here is a little helper I use...If my text seems lopsided no matter how many times I try to "space" it into place, I highlight the whole text (This is all done in the text box window of course, before I hit apply), and then I use my KERNING box up in my font menu bar. Try typing in increments of five plus or minus and see if that is a little adjusting you need. When you are thru don't forget to go back and set your kerning to zero again. Now that you know how to do text on a curve the next thing you are gonna want to know is how to get it to curve the other way than just across the top. You are gonna say...ok so how do I get it to curve like the bottom of my circle. It is this simple: Instead of dragging your VECTOR circle (not the colored one) from left upper corner, towards the right and down. you are going to drag from the lower left corner and drag UP and to the right. ***YOU CAN NOT HOLD YOUR SHIFT KEY DOWN WHEN YOU ARE REVERSING A VECTOR CIRCLE LIKE THIS, IT WON'T WORK. But you can eyball it and then adjust your nodes.. Once you have your VECTOR circle adjusted to fit your colored circle follow the same steps as above and your text will run with the curve of your bottom of your circle. I know this tutorial is a little more advanced than the others but I figured it was an intermediate question and I could probably get away with it lol...if anyone has trouble understanding just tell me where you are having problems and I will clarify... I hope this tutorial helps... Hugs Marilyn Marilyn Allen Tuts So lets just take the text on a curve...forget the rest 1. open a blank canvas 2. get out your preset shape tool and shape is elipse 3. Click the RETAIN style box 4. Drag and draw your circle 5. get out your text tool and choose the font, size etc. ( the larger your font the more it will warp your letters) 6. Go to your circle and move cursor over it until you see the rocker arm A and click 7. Type in your text, adjust it and then apply 8. In your layer palette go to your VECTOR layer, click the + sign and hide the elipse/circle and convert to raster Voila you have texted on a curve 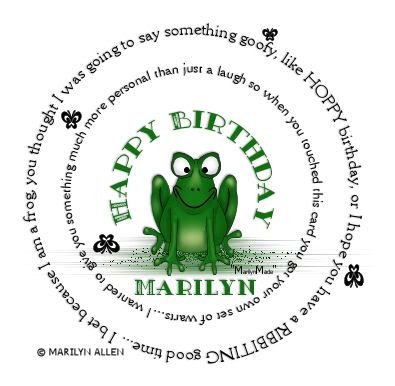 |


Copyright © 2000- Aimoo Free Forum All rights reserved.
Skin by SandhillsDebby © Trina Clark digiscrapkits.com
